How To | October 3, 2023
How to setup multi-factor authentication in Microsoft 365 admin portal?
Multi-factor authentication (MFA) is an effective way to protect your users accounts and data from unauthorized access.
In this article, we will guide you through the process of setting up multi-factor authentication in the Microsoft 365 admin portal.
Understanding Multi-Factor Authentication
Passwords alone are not sufficient to protect account access.
Multi-factor authentication (MFA) adds an extra layer of security.
By enabling MFA, you not only verify your password but also provide another form of authentication, such as a mobile app or a verification code (SMS) sent to a trusted device. This greatly reduces the risk of unauthorized access to user accounts.
Importance of Multi-Factor Authentication
Why is multi-factor authentication important?
Well, imagine a scenario where an unauthorized person gains access to your password. Without MFA, they would have full access to your Microsoft 365 account, including emails and data. However, with MFA enabled, they would still need that additional form of authentication to log in successfully.
MFA adds that extra layer of protection, drastically reducing the risk of unauthorized access.
How Multi-Factor Authentication Works With Microsoft 365
When MFA is enabled in Microsoft 365 and you enter your password, Microsoft 365 will prompt you to provide the second form of authentication. By providing this additional proof, you are then granted access to your account, email and data. You will usually only have to do this once (like when you setup a new device for example) not every time you login.
Multi-Factor Authentication Setup
Necessary User Permissions
A Microsoft 365 Admin account with the necessary permissions is required to enable multi-factor authentication for users.
Step-by-Step Guide to Setting Up Multi-Factor Authentication
Accessing Microsoft 365 Admin Portal
To begin, log in to your Microsoft 365 admin portal using your administrator account credentials.
Navigating to Multi-Factor Authentication Settings
Within the admin center, locate the “Users” section and click on “Active users.”
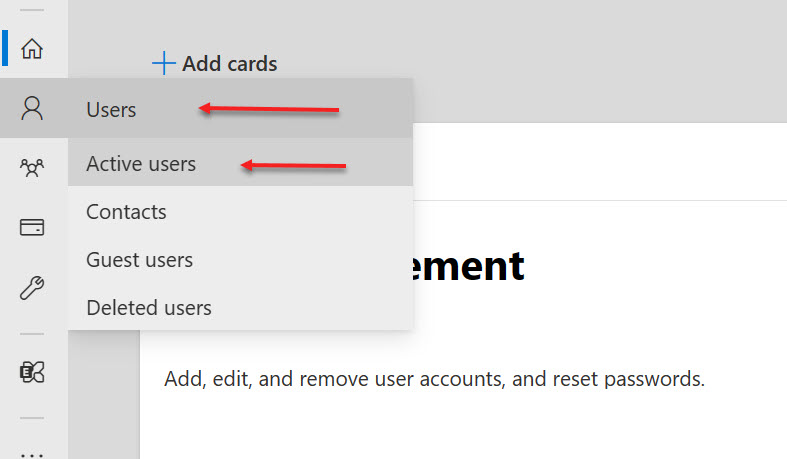
This will display a list of all the active users in your Microsoft 365 account. From here, select the user(s) for whom you want to enable multi-factor authentication.
Configuring Multi-Factor Authentication for users
After selecting the user(s), click on the “Manage multi-factor authentication” option at the top of the page. This will redirect you to the multi-factor authentication settings page. Here, you can configure the MFA settings for the selected user(s).

Select the user, then click enable MFA, require users to set up MFA on their next sign-in
This will activate multi-factor authentication for the selected user(s) and they will be prompted to set up their additional form(s) of authentication during their next sign-in.
It’s important to communicate the changes and benefits of MFA to your users, as they may encounter the additional layer of security during their sign-in process.
Congratulations! You have successfully set up multi-factor authentication in your Microsoft 365 admin portal.
If you get stuck or need help, please contact us